Introduction to LynxJS: A Lightweight JavaScript Framework
LynxJS is an exciting open-source framework developed by ByteDance, the company behind TikTok, designed to empower developers to create cross-platform applications with native user interfaces (UIs) using a single codebase. Leveraging web technologies like JavaScript, CSS, and React-inspired syntax, LynxJS allows developers to build high-performance applications for mobile (iOS and Android) and web platforms. Announced as open-source in early March 2025, LynxJS combines a fast, Rust-powered rendering engine with a dual-threaded UI system, making it ideal for large-scale, interactive applications. In this article, we’ll explore what LynxJS is, how to use it, and how to deploy it, and we will provide a code sample to get you started.

🚀 What is LynxJS?
LynxJS is a framework that bridges the gap between web and native development. It enables developers to write code once and render it natively across multiple platforms, including Android (API 21+), iOS (10+), and the web. Unlike other cross-platform frameworks that rely heavily on web views, LynxJS uses a custom renderer to ensure pixel-perfect consistency and native performance. Its multithreaded engine ensures instant app launches and smooth UI responsiveness, even when embedded in larger applications.
🎯 Key features of LynxJS include:
- Write Once, Render Anywhere: Native rendering for mobile and web from a single codebase.
- Web-Inspired Design: Familiar CSS and React-like syntax for rapid development.
- Performance at Scale: Powered by Rust and a multithreaded architecture for silky-smooth UIs.
- Open-Source Ecosystem: Licensed under Apache 2.0, with documentation available at lynxjs.org.
- Scalability: Optimized for large-scale apps, as demonstrated by its origins in TikTok’s ecosystem.
Whether you’re a web developer looking to dip your toes into native app development or a seasoned mobile developer seeking a unified workflow, LynxJS offers a compelling solution.
How It Works
LynxJS operates on a dual-threaded model:
1️⃣ UI Thread: Handles native rendering and animations using Rust, ensuring 60 FPS performance.
2️⃣ JavaScript Thread: Executes app logic and state management, communicating with the UI thread via an efficient bridge.
This separation eliminates jank and enables instant app startups — critical for embedded mini-apps or standalone experiences. The framework’s tooling, also Rust-based, delivers sub-second build times, a boon for developer productivity.
💥 Setting Up LynxJS
Before diving into code, let’s set up your development environment. LynxJS assumes some familiarity with modern JavaScript workflows but provides a streamlined CLI to get you started.
Prerequisites
- Node.js: Version 18 or higher (download from nodejs.org)[Requires Node.js 18.19 when using TypeScript as configuration.].
- npm or yarn: Package managers (npm comes with Node.js; install yarn via npm i -g yarn if preferred).
- Mobile SDKs (optional): Android Studio (for Android) and Xcode (for iOS) if targeting mobile.
- Lynx Explorer App (optional): This app is available on iOS and Android for rapid testing via QR code.
🎉 Installation
❶ Create a new Lynx project:
Lynx use Rspeedy(a Rspack-based Lynx build tool) to build a Lynx project. It is recommended to start a new project usingcreate-rspeedy, which sets up everything automatically for you. To create a project, run
npm create rspeedy@latest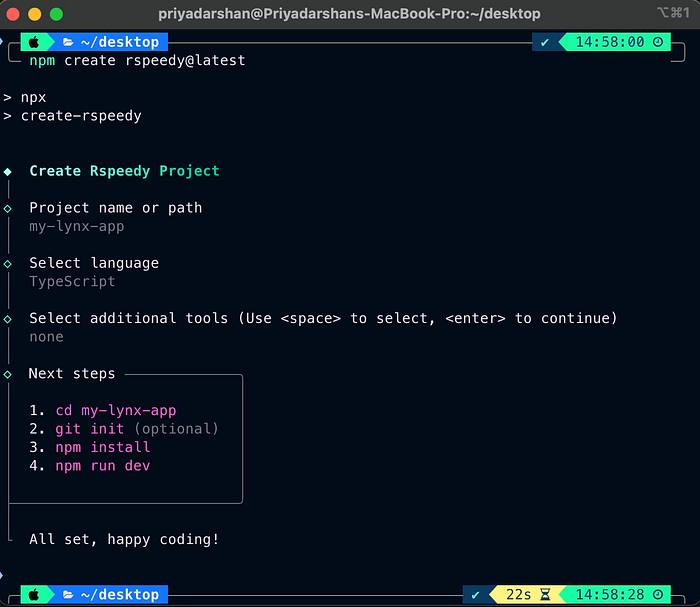
After the prompts, create-rspeedy will create a folder with your project name
❷ Prepare Lynx Explorer:
Lynx Explorer is a sandbox for trying out Lynx quickly.
For IOS Simulator 📱
1. Install Xcode
Open up the Mac App Store, search for Xcode, and click Install (or Update if you have it already).
2. Download LynxExplorer
Download LynxExplorer-arm64.app.tar.gz.
Then, extract the downloaded archive:
mkdir -p LynxExplorer-arm64.app/
tar -zxf LynxExplorer-arm64.app.tar.gz -C LynxExplorer-arm64.app/
After Extract, drag the LynxExplorer-arm64 File to the iOS simulator
3. Install LynxExplorer on Simulator
Open Xcode, choose Open Developer Tool from the Xcode menu. Click the Simulator to launch one. Drag “LynxExplorer-arm64.app” into it.

💥 Start developing
- Enter the created project:
cd <project-name>
- Install the NPM dependencies with package manager:
npm install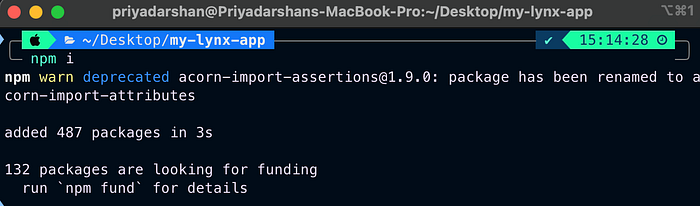
2.To start the development server, run:
npm run dev
You will see a QR code showing up in the terminal, scan with your Lynx Explorer App.
Or copy the URL
http://192.XXX.xx.xxx:3000/main.lynx.bundle?fullscreen=trueand paste it, enter card URL

Then click Go after this, navigate to the Below page

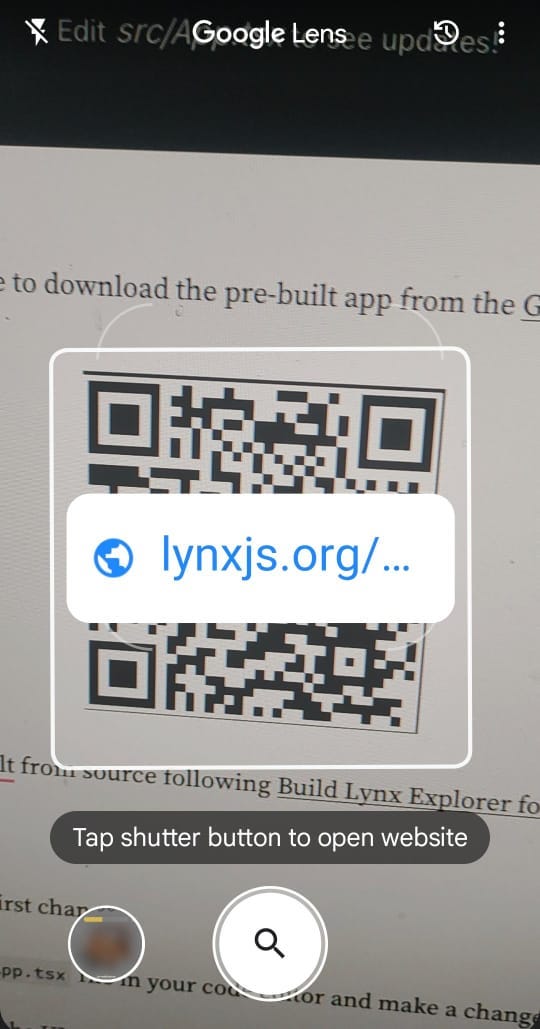
For Android 📱
Scan the QR code to download the pre-built app from the GitHub Release.

Or, you may built from source following Build Lynx Explorer for Android guide.
👍 Make your first change
Open the src/App.tsx file in your code editor and make a change.
You should see the UI on your Lynx Explorer being updated automatically.
import { useCallback, useEffect, useState } from "@lynx-js/react";

import "./App.css";
import arrow from "./assets/arrow.png";
import lynxLogo from "./assets/lynx-logo.png";
import reactLynxLogo from "./assets/react-logo.png";

export function App() {
  const [alterLogo, setAlterLogo] = useState(false);

  useEffect(() => {
    console.info("Hello, ReactLynx");
  }, []);

  const onTap = useCallback(() => {
    "background-only";
    setAlterLogo(!alterLogo);
  }, [alterLogo]);

  return (
    <page>
      <view className="Background" />
      <view className="App">
        <view className="Banner">
          <view className="Logo" bindtap={onTap}>
            {alterLogo
              ? <image src={reactLynxLogo} className="Logo--react" />
              : <image src={lynxLogo} className="Logo--lynx" />}
          </view>
          <text className="Title">React</text>
          <text className="Subtitle">on Lynx</text>
        </view>
        <view className="Content">
          <image src={arrow} className="Arrow" />
          <text className="Description">Tap the logo and have fun!</text>
          <text className="Hint">
            Edit<text style={{ fontStyle: "italic" }}>{" src/App.tsx "}</text>
            to see updates!
          </text>
        </view>
        <view style={{ flex: 1 }}></view>
      </view>
    </page>
  );
}
⚠️ Debugging
Visit Lynx DevTool to download and open the Lynx DevTool desktop application. Use a USB cable to connect the debugging device, and start debugging.
Visit Debugging, learn how to debug your Lynx app.
💥 How to Deploy LynxJS
Deploying a LynxJS app varies by platform. Here’s a detailed breakdown.
🌍 Deploying to the Web
⑴ Build:
npm run buildOutputs static files to dist/static.

⑵ Host:
- Vercel: Run vercel in the project root, follow prompts, and deploy.
- Netlify: Drag dist/web into Netlify’s dashboard or use netlify deploy.
- Manual: Upload to any static host (e.g., AWS S3, GitHub Pages).
💥 Why LynxJS Stands Out
As of March 08, 2025, LynxJS’s open-source debut positions it as a contender against React Native, Flutter, and Ionic. Its strengths include:
- Performance: Native rendering and multithreading outpace web-view-based frameworks.
- Developer Experience: Sub-second builds and a familiar syntax accelerate workflows.
- Ecosystem Potential: Backed by ByteDance, it’s poised for rapid adoption and community growth.
Challenges include a nascent ecosystem and limited third-party libraries, but its Apache 2.0 license invites contributions.
🥷Difference between LynxJS & React Native

👍 Conclusion
LynxJS offers a powerful, modern approach to building cross-platform apps with a single codebase. By combining web-inspired syntax with native performance, it lowers the barrier for web developers to create mobile apps while delivering scalability for large projects. Whether you’re prototyping a simple app or building a complex, interactive experience, LynxJS is worth exploring.
To dive deeper, visit lynxjs.org for full documentation and join the growing community on GitHub at lynx-family/lynx. Happy coding!

Thanks for reading this article… 💖
